Spring is here and well-kept orchids are starting to root and build new leaves – an ideal time for repotting orchids. It is possible to repot in all seasons, but my experience is that orchids handle repotting in spring much better – especially in our climate, since the warmer temperature and more light enables them to develop new root mass quickly.
A basic rule is that you should repot your orchid or give it fresh substrate for the first time, after you had it for at least a year. After that you can repot every second year.
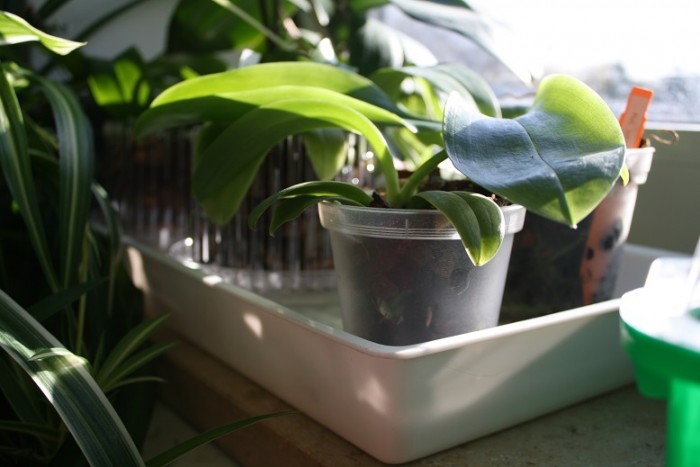
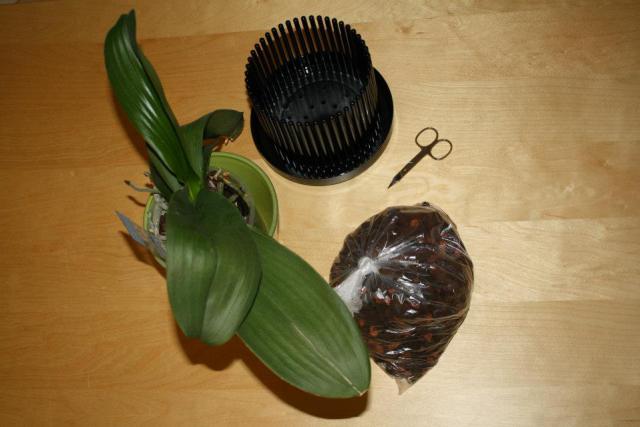
Repotting orchids takes some practice, but it is also fun. Especially after you’ve finished and can rejoice in the outcome. In the following article I provide you with a step-by-step manual which helps you to repot your orchids. In the pictures you can see a special pot for orchids, the so-called Orchitop*. Don’t worry, this manual is of course also well suited for normal pots.
By the way, you can repot a blooming or budded orchid. Especially multihybrids can handle the repotting. Worst case is that the buds start to go limp more quickly or that the buds dry out. From my orchids I haven’t had any complaints so far ;D.
Repotting orchids – preparations:
- Repot on the balcony or outside – or cut up some garbage bags as coverage.
- You need a sharp – if possible sterilized – scissor and fresh substrate.
- Just in case have new pots in various sizes ready.
Repotting orchids – Step 1: Taking the orchid out of the pot
In order to repot your orchid, first you have to take it gently out of the pot. At times, that can be quite difficult, because orchids with strong roots tend to root themselves on the side of the pot or grow through the holes in the bottom of the pot. Most times the roots which are on the side of the pot can be removed by gently kneading the pot with your hands. The inside of the pot is being loosened and the roots can be removed from the side of the pot without any damages.
If this method was successful, you pull out the roots which have grown through the bottom one by one. If this doesn’t work you can take your scissor and cut the pot in order to get to the roots. Depending on how damaged the pot is, you can still reuse it. If it is no good anymore, just take a new pot.
An alternative is to soak the orchid for at least one hour in water. This makes the roots more flexible and easier to remove them from the pot. Give both methods a try and see which one suits you best. Some orchids nearly fall out of the pot without using any of the methods.

Repotting orchids – Step 2: Removing old substrate
Now that the orchid with all its roots is successfully taken out of the pot, the next challenge awaits you: the old substrate needs to be removed from the orchid’s roots. There are a few cases where the orchids let go of the old substrate by themselves. Mostly, the roots stick to the substrate. In general this is not a bad sign, since it means that the orchid has grown well and has firmly taken root in the substrate.
But since the orchid is supposed to get new substrate, it is important to carefully remove the old substrate without damaging the roots. Except if the root is withered anyhow, but more about that in step 3. If it gets too difficult to remove the old substrate, you can leave some of it on the roots, but your primary aim should be to remove as much old substrate as possible in order to make room for new substrate. Again you can soak the roots in water in order to help removing the old substrate.

Repotting orchids –Step 3: Cutting withered roots
When step 2 is finished we start with giving your orchid a pedicure. If an orchid has been inside a pot for a longer time, it is most likely that some of the roots have died. This is due to the aging process and quite normal. Dead roots are either completely dry or sludgy. The latter can be the case due to either too much watering or due to too old substrate which couldn’t dry out properly. This is an indication that you picked the right time to repot your orchid.
Take the scissor and cut off all roots which have died. It is important that the scissor is sharp. There are special scissors for orchids which are quite useful. The healthy roots which are vital, green or silvery are of course staying on the orchid. Try to avoid cutting them by mistake. If you happen to accidently damage one of the healthy roots, you can put some high quality cinnamon on the wound in order to heal it. Cinnamon is anti-bacterial and protects the orchid from germs and vermin. Now that the dead roots are eliminated the orchid can go back into the pot.

Repotting orchids –Step 4: Putting the orchid back in its pot
Once all of the dead roots are eliminated the healthy roots can go back into the pot. You can reuse your old pot, but make sure that you thoroughly clean it beforehand with hot water and a brush. It is only necessary to use a new and bigger pot if the orchid has gained a lot of roots, so that the orchid – even after the pedicure – doesn’t fit into the pot anymore. Remember that the new substrate has to fit into the pot as well.
A basic rule is to rather take a tighter than a bigger pot for your orchid. The reason is that big pots prevent the substrate to dry quickly after the orchid has been watered. Then the roots can become moldy. So remember: orchids like it tight inside the pot. And how do we fit the roots back inside the pot? I always put a layer of substrate in first. Then I position the end of the roots inside the pot and turn the pot repeatedly in one direction so that the roots are slowly but surely turned in the pot. You keep turning until the roots are completely back inside the pot and the orchid itself is back in its former position.
This procedure can be a bit complicated at times, but it works eventually. You have to be patient and very careful that the roots won’t break. This method of turning the roots back into the pot has been proven to be quite successful.

Repotting orchids – Step 5: Filling the pot with substrate
You’ve nearly made it! There is only one more challenge ahead: new substrate needs to be filled inside the pot, because the orchid doesn’t like sitting in the pot with naked roots. After all this stress we of course like to do it this favor.
The easiest approach would be to just fill up the pot with new substrate. But since there are a lot of roots inside the pot you can’t simply do that. The trick is to fill some substrate in the pot and then gently knock the pot on the table so that the substrate can slowly trickle down. Apply this procedure as often as it needed until all spaces are evenly filled with substrate.
Even though the whole procedure might seem laborious at first, you will see the results very soon. FINISHED: your freshly repotted orchid can now go back to its place!
After repotting:
- Dispose of your old substrate, because it is most likely decomposed and enriched with salt from the fertilizer so it is not usable anymore.
- Don’t water your orchid for a few days, so that wounds which might have resulted due to the repotting have time to close up and heal properly.
- Rejoice in the sight of your newly repotted orchid! If the used substrate was pre-fertilized don’t put fertilizer into the water which you use for watering your orchids for a month. The water should always be as deficient in lime as possible.
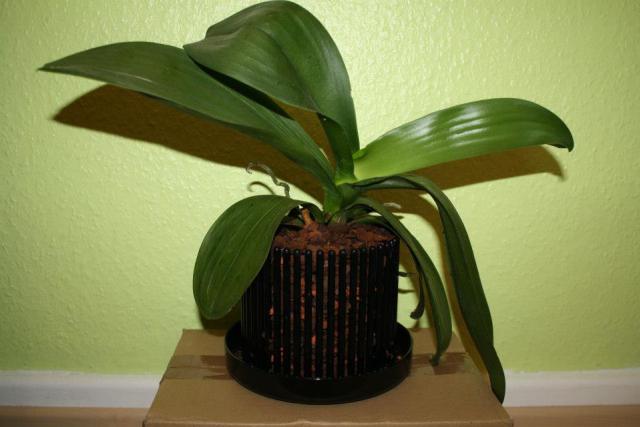
You are finished. Now everything is ready for the next flowerage.
I am eager to learn if my manual was helpful. Or maybe you have some additional tips for repotting which you would like to share! I am looking forward to your comments.
*This is an affiliate-link, which means that if you buy something on this website I will receive a commission. This does not influence my rating of a product or a supplier. I only recommend products and suppliers which I truly support.